How to Stencil a Wall in 2hrs

A month ago I stenciled an accent wall in my living room. You can read about it in my post ‘Marker Wallpaper.‘ This was probably one of the easiest projects I have ever done. Today I’ve decided to share the steps I took to get this look.

Tools/ EquipmentSharpie oil-based medium point markers, stencil pattern, level, tape measure

Steps:

  1. Find the pattern you want for your stencil. I used Jones Design Company’s stencil pattern.

    Stencil Pattern
    Stencil Pattern
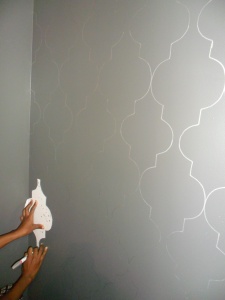
  2. Adjust the stencil according to your needs. To make sure all my sides were perfect I folded the pattern in quarter, traced it on a sheet of paper (that was also folded in four) and then cut the pattern out. It was more accurate than my earlier cut out for the practice wall.
    1. Before painting the pattern with a permanent marker, I tested the pattern with chalk on about 1/8th of the wall and again with a gold marker on a small wall in the guest room. This was important for me to see if this was something I liked.

      Chalk Outline
      Chalk Outline
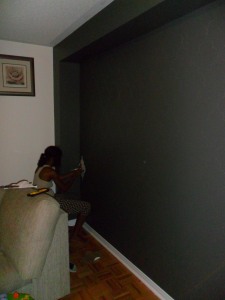
  3. Start with a clean wall. Ours was freshly painted.

    Kendall Charcoal by Benjamin Moore
    Kendall Charcoal by Benjamin Moore
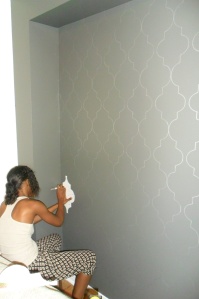
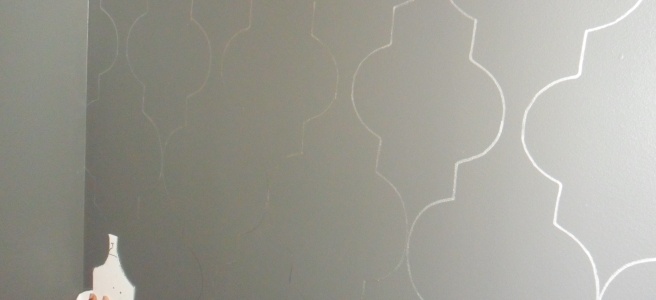
  4. Find the centre of the wall; I used a tape to measure the width of the wall. Then begin stenciling from the centre and work out towards the corners. I did an entire column in the centre of the wall before branching off to the sides.
  5. I decided that I wanted my inner pattern a bit smaller than the outer ones. To do this I reduced the size of the stem for the inner patterns. For a consistent size, I made a mark on the stencil to know where the inner pattern’s stem should start. I also marked the stencil showing T (for top) just to make sure I held it in the same position throughout the job.
  6. I used a level. It made the pattern more accurate.
  7. I was able to stencil the entire wall with only one marker. I would suggest getting at least two. As with any marker left opened for too long, the colour tends to fade. To remedy this I had to shake the marker periodically as well as close it for a minute at different intervals.

    I worked outwards from the centre of the wall.
    I worked outwards from the centre of the wall.
  8. Then stand back and look at your masterpiece. Be ready to stare at it for days with a pleasant smile.

Lovebug

My friend’s daughter had her 1st birthday party on Sunday. Her mom calls her love-bug, and that inspired her to plan her party using the ladybug theme.

With less than a week to go, the planning began for a party with a small budget.

We visited Party Packagers but the items from the ladybug theme were only available online. Shipping would take up to 10 business days, we didn’t have that much time to wait.

So I convinced her that we could make our own items and still pull off a lovely ladybug themed party.

  1. The Headpiece

While rummaging through Dollar Tree we came across a ladybug toothbrush cover. I used a pliers to get its base flat and then used felt to give her an underbelly. I then used my glue gun to attach green felt cut in a flower pattern to a black headband. I then attached the ladybug to the green felt and by extension, the headband.

p20141103-191735 p20141103-191227

2. The Banner:

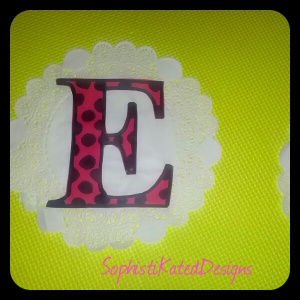
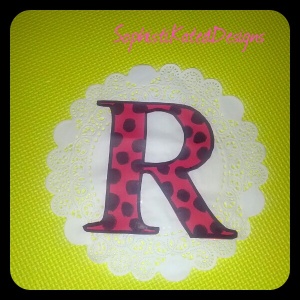
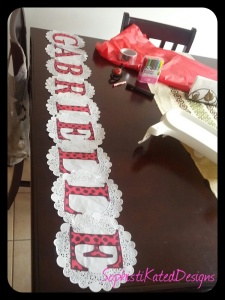
The first item I worked on was a name banner. I decided to use the Times Roman font. I typed Gabrielle’s name on a word document, enlarged it to approx 170. Then traced the letters directly from the computer’s screen unto trace paper. I then placed the trace paper on red stock paper and traced the letters. Using a black marker, I outlined the letters.

I then cut them out and randomly added black dots.

The letters were then glued unto doilies. One doily per letter.

p20141103-192131 p20141103-192018

I strung a cord through openings at the top of the doily and used tape to hold the cord in place.

p20141103-192513

3. The Tablecloth:

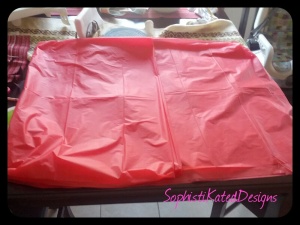
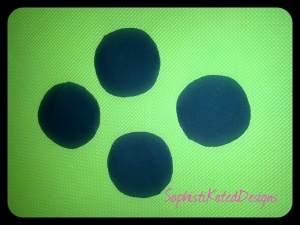
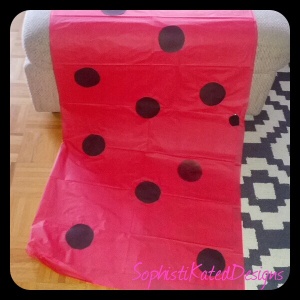
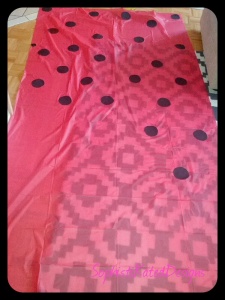
We bought a red tablecloth at Dollar Tree. I started to use a black marker to create black circles on the tablecloth but that was time consuming. I then tried black tape but again it was icky to work with and taking too much time. I then used a tape as a stencil to cut out circles from black stock paper. I glued the circles to the tablecloth.

p20141103-193014 p20141103-191905 p20141103-192232 p20141103-192339

4. Pom Poms

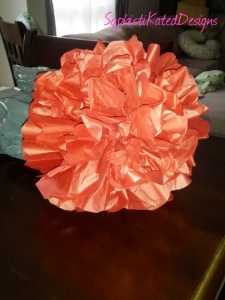
I followed the online directions on how to make tissue paper pom poms. I made three sizes.

p20141103-192625 p20141103-192820 p20141103-192713

5. Mini Ladybugs

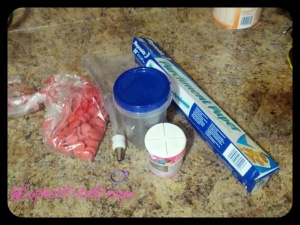
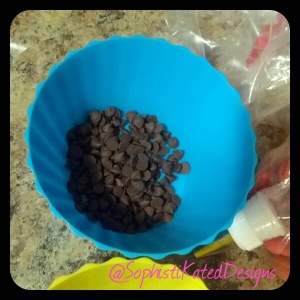
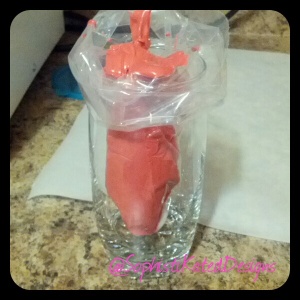
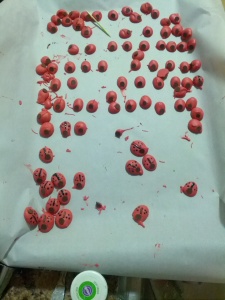
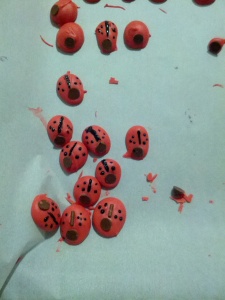
I made mini ladybugs using red candy wafers, chocolate pieces, brown sprinkle and black food colouring. I added the mini ladybugs to the cupcakes and the main cake.

p20141111-194645 p20141111-194856 p20141111-195007 p20141111-195105 IMG_20141109_004339 IMG_20141109_004343

6. The Cupcakes

I used leaf green food colouring to decorate most of the cupcakes. I then added mini ladybugs were then added to them.

IMG_20141109_004322 IMG_20141109_004329 IMG_20141109_004305 IMG_20141109_004253

7. The Cake

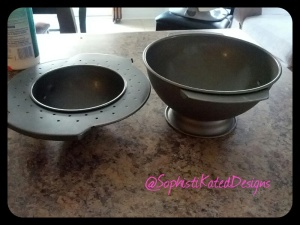
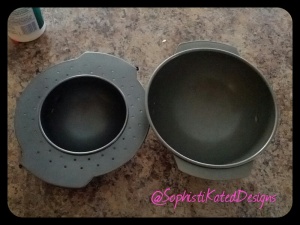
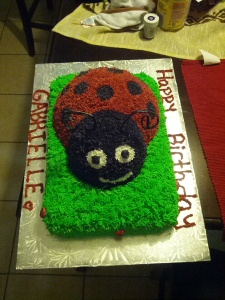
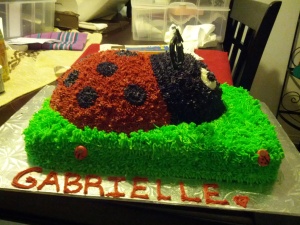
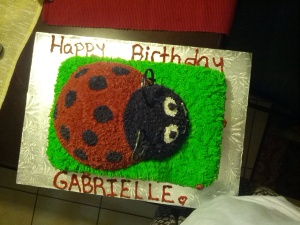
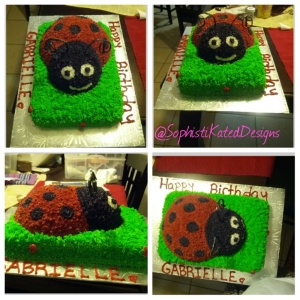
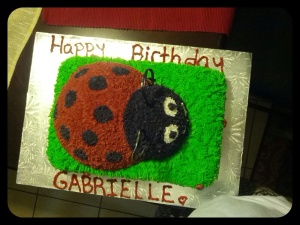
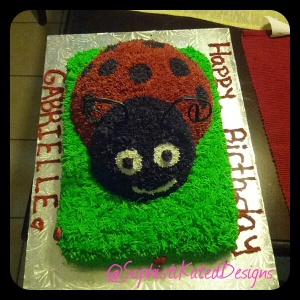
For the bug shape I used a large and mini soccer ball baking tin. I elevated the ladybug on a grassy base (chocolate cake with chocolate filling).

p20141111-194550 p20141111-194455 IMG_20141109_004237 IMG_20141109_004231 IMG_20141109_004216 IMG_20141109_004208 p20141111-195904 p20141111-195528 p20141111-195449

If you have any questions about how to make any of the items let me know!

Marker Wallpaper

p20141014-143232 (1)

Yesterday was Thanksgiving and we had a lovely family dinner. At the end there was hardly any food leftover! It seems as if the excitement wearied my son, he’s been taking marathon ‘naps’ since last night. So… I have some time to share with you my most recent project- Stenciled Accent Wall!

When we did the first tour of our home, before putting in an offer, the wall in the living room had a stone design wallpaper. Thankfully, they removed it before we moved in. Since then I have tossed a few ideas around in my head about what to do to the wall. My brother (13 years old then) suggested built-in bookcases  but based on the overall layout of our space that would be too much.

Then I got hooked to the idea of putting up wallpaper. I found the perfect design and even bought enough rolls to cover the wall. I thought doing a Google search on how to install wallpaper would solve our installation needs, but after reading the steps I grew a bit timid. I didn’t want to mess the paper up or even worst do a not so perfect job. I kept the rolls for about 2 months, and then took them back for a refund.

Months later I got back to thinking about the wall. This time I hunted Kijijji and Craigslist looking for a wallpaper installer before I made another purchase.  The price quotes for were outside of my budget, ranging up to $1000! No way Jose’!

We found one guy that quoted us $180 and his portfolio was quite impressive. But then I started thinking what if I didn’t like the wallpaper after installing it. All that money would go to waste or I’d be stuck with a pricey wall that I don’t like until I could afford to do something else.

I started looking for alternatives. Blogs and Pinterest are littered with lovely stenciled walls, all sorts of designs and colors at a reasonable price. I chose a stencil and was on the brink of ordering one when I came across a painted wall paper tutorial on Jones Design Company. She used a cardboard stencil to create her perfect wall!  She even had a template for free.

I immediately sketched the template from my laptop’s screen (yeah, my printer’s cord got misplaced in the move and the new one has sat at Global industries for a year awaiting pick-up). Got myself a piece of chalk and completed about 1/8 of the wall to see what it would look like. I fell in love! My mom loved it and Hubby loved it!

I was sold…until the reality struck that with such an active child I may not have the time to trace a wall in pencil and then spend time painting the trace marks. I only had time for one run at that wall (there are other projects I’d like to complete before heading back to work).  Also I didn’t like the look of the pencil lines peeping out in some projects that I saw. I needed something quicker and neater.

My pilot using the chalk looked lovely but could be easily wiped off –just not permanent enough.  I started searching for wall markers on Google and came across a marker by Sharpie called “Paint Marker”. I decided to give it a try. I ordered one pack- if it worked I’d order more. The pack had one gold marker and one silver. I tried the gold on a small wall in the guest room, liked it and then moved to our more public area- the living room.

I first painted the wall in Kendall Charcoal and then made a new stencil. It took me about 2.5 hrs to complete the wall. I worked on it while watching TV and interacting with family.  I applied techniques from other bloggers such as folding the paper in 4 to cut the stencil out ,starting from the centre of the wall, and using a level to keep things straight.

This is the best before shot of the wall  I could find (very old pic-first day moving in; in my excitement to get started I forgot to take an updated before shot):

before

This shows my pilot project- using chalk to create the design on the original wall colour:

original


And this is the result:

SAM_5090


SAM_5082 - Copy


SAM_5091

I have no regrets. Yesterday was Thanksgiving and my wall was a hot topic. At first some thought it was wallpaper!  Everyone loved it!

I love it!

Keep posted for the steps I took to stencil my wall using techniques from other bloggers.  Or check out the original tutorial at Jones Design Company.
I’ve finally found someone…

It feels like I have not typed for a social reason (except for Facebook posts) in decades. I have missed blogging and I have missed you.

But once you know what’s been happening in my life, I’m pretty sure you will forgive me.

My last post was on May 14, 2013 and featured my makeover of a cane chair. I was looking forward to moving the piece into our master bedroom. But God had better plans….

The chair ended up in our NURSERY!

Yeah, that’s right. Right then in May we found out we were expecting our first child. 2013 became a year of much celebrations: turning 30, buying our first home in Canada, moving to a new city, and the icing on the cake- becoming parents. So things have been quite busy. Settling into a new city, new community, setting up a new home, preparing for a baby, and doing it all during fall/winter.

On December 28th we welcomed our biggest blessing with tears of joy (and pain :)).

So you can understand why I have been MIA for such a long time.

This has been the greatest task given me. And if you know me- I’m gonna give it my all. I must admit, it hasn’t been easy. There are days I really don’t know what to do when the fussiness takes over. There are times I miss my quiet space and being able to do whatever I want to do whenever I want to- like blogging :). There are days when I do not like the feel of pee soaking my clothes, or having to wake up at odd hours of the night. There are days when I want to be the introvert that I am- but my child seems to be an extrovert! I watched him yesterday on a play date with some friends and he was having a blast. There’s no dull moment when he’s around.

I still look at him in awe and now that I can touch him and cuddle him my favourite song while pregnant has taken on an even stronger meaning:

A Mother’s Prayer

 Verse:
My sweet baby on loan from above.
No better treasure could I more love.
I stand here beside your bed as I pray
Ilay my hand on your head and I say:

Chorus:
May you grow up to serve Him
all of your days.
May He lead you and guide you
in all of your ways.
May His hand bless your future with
friendships that last.
May you cherish your youth
and not grow up too fast

Verse:
I stare in wonder at your tiny frame.
Just to think that God knows you by name.
He knows every hair on your beautiful head.
He knows your thoughts before they are said.

Chorus:
May you grow up to serve Him
all of your days
May He lead you and guide you
in all of your ways.
May His Hand bless your future with
friendships that last.
May you cherish your youth
and not grow up too fast.

Prayer:
May God grant you peace
in the midst of a storm.
May God give you strength even
when you’re forlorn.
May you answer the door when
Jesus comes knocking.
May wisdom guide when
your mouth is talking.
May discretion protect you
and keep you pure.
May you never stumble
or fall for a lure.
May your heart remain humble
to the very end.
May uprightness and truth
be what you defend.
May the world not ensnare
or change who you are.
May the light that’s within you
shine like the stars.
May angels surround you
body, spirit, mind.
May favor and peace be yours to find.
May rejection and pain
never reach you.
May your spirit grow bold
for what you’re called to.

Chorus:
May you grow up to serve Him
all of your days
May He lead you and guide you
in all of your ways
May His Hand bless your future with
friendships that last.
May you cherish your youth
and not grow up too fast.

Singing:
As you rest in God’s care I will rest, too.
Knowing that Jesus is watching over you.
Amen

I finally found someone who throws me completely off my game and I just have to go along with it – no complaints. I love him. He’s the guy I spend my days with, make silly faces and sounds for, sing to without a care of who’s listening, read the same stories to over and over again, listen to the same CDs with on our drives. He”s turned me into a ‘morning person,’ a late-night laundry queen, a germaphobe, a crazy dancer, an expert bottle washer, a baby food puree’ chef, a ladder, a bouncy seat, a big toy (teddy bear), a lighter sleeper and a candid photographer/ videographer. But most of all He’s turned me into a MOM.

SD

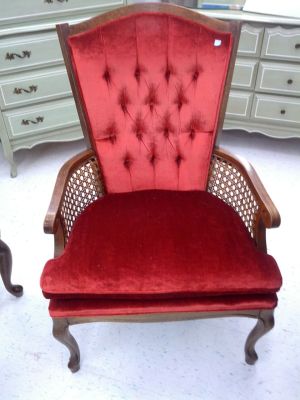
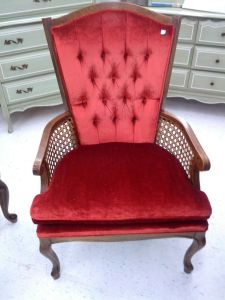
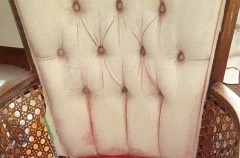
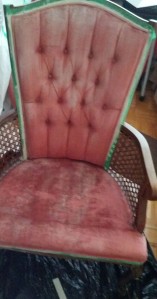
My Red Velvet Cane Chair

I was in luck a few months ago when I scored this chair for $34! For weeks I played with different ideas of how to make this chair my own.

original

I soon found my inspiration chair at Dimples and Tangles


My first attempt to transform my chair was inspired by this post I found via Pinterest by Pinterest Addict, she used Tulip Fabric Spray Paint to paint her chair. Hers turned out quite well after 5 bottles; I can only imagine how many I would need to turn my chair from red to snow white! I realized that this would be an expensive venture when one bottle failed to cover the front side of the cushion adequately, and I did not like the texture  (with a 40% discount at Michaels each bottle cost 6.90!).

ZFj6hKzVdqW-UbD8Z9vwrFl9ypyE22_XuOleEYTk5OE

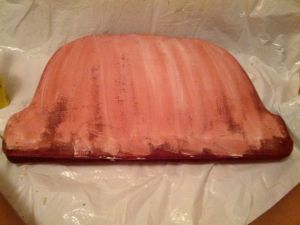
My second attempt was inspired by Hyphen Interiors and Vintage Revivals . I got my paint at Home Depot and my fabric medium at Michaels. I painted, painted and painted.  After my fourth coating, I knew this too was a fail. I felt better knowing I had lots of company in the ‘fail category’.

i3LLxdBK5VgQ32M--2bvCrxOjmSbOroBHq7vn-lI03g

itPmkpwT80hx1aWMVlwfAvx_7Mep-r0ADFkFVCJvE3w

Maybe, if I had persevered for a few more coats the turnout would have been different, but the texture of the chair wasn’t appealing – it was too coarse for my liking. I wanted something that would be comfortable to sit in.

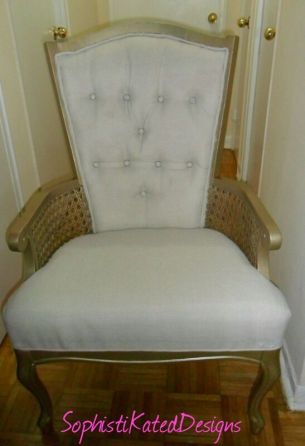
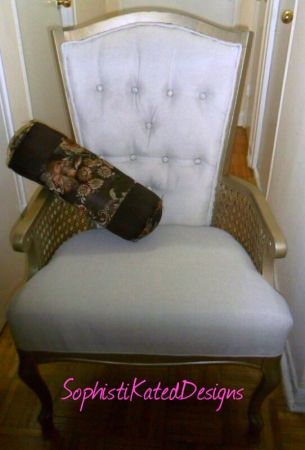
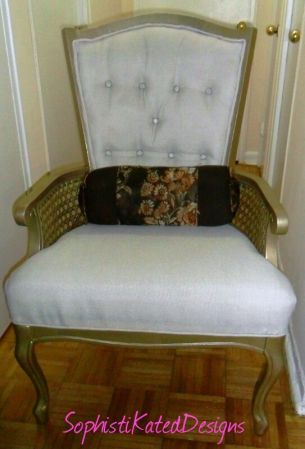
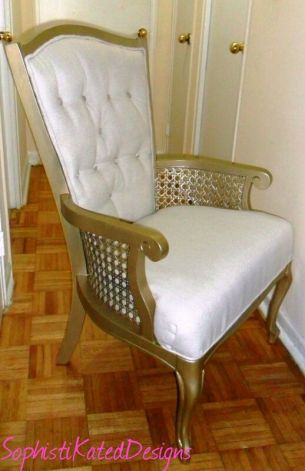
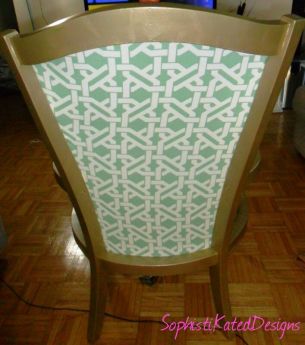
Throughout my attempts at painting my chair, I had my back up plan. If painting failed I would strip her all down and start afresh. That I did. And I am pleased with the outcome: Red Velvet Chair: The Makeover!

Master Bedroom Inspirations

It’s been awhile since I have shared anything new. These past weeks have been quite busy. I am shopping around for key pieces that fit my inspirational photos.

These are some inspirational photos that I’m using for our master bedroom :

Source: http://homeimprovementpin.com/2013/02/05/i-really-like-the-idea-of-putting-a-mirror-behind-nightstands/
Source: http://media-cache-ec4.pinimg.com/736x/20/8c/50/208c5079c34087cc12d97434b1711682.jpg
Master Bedroom Wall Art
Source: http://houseofroseblog.com/home-tour/
Source: http://www.bhg.com/rooms/bedroom/master-bedroom/25-of-our-favorite-real-life-bedrooms-/#page=6
Source: http://www.addicted2decorating.com/wp-content/uploads/2010/09/j-and-a-master-bedroom-after-16.jpg
Source: http://www.addicted2decorating.com/gallery/cache/bedrooms/artistic-designs-bedroom7_w417_h550.jpg

Of course, to buy key items from these photos would cause me to break the bank, which I have no intention of doing. So I am shopping around and will update you on my finds!

A Perfect End to a Monday: Great Thrift Finds!

Three thrift stores in one day!

BOARD GAMES

I love board games but they can be quite pricey. I took a trip to one of my favourite thrift shops just to see what was new and came across a stash of board games- including 3 of my favourites!

5 board games for $7.95! That less than $2 bucks each!


p20130422-203229

These were my finds:

Gesstures

Paid- .99c

Online for a low of $21.79 at Targets and a high of $199 on Amazon.com

And yes- all the parts, including instruction sheets were available J and the timer works!

Scattergories– I already have the Bible Version which I enjoy playing. Now I have the original!

Paid: $1.99

Online for a low of $37.03 on Amazon  and a high of 79.99 for the 1988 version (mine is 1989).

Probe– I’ve never played this game before, but the write-up was intriguing, plus it’s a word game!

Paid: $1.99

Online both on Amazon.com – $99.49 and $159.99

Twister

Paid .99c

Online for $19.99 on Amazon (the box is slightly different)   and $24.95 on Ebay

Chinese Checkers (Solid Wood) (2 pieces, one with  a chess board on the reverse)

Paid: $1.99 (missing marbles)

Online low of  a high of $37.99 on Ebay (one piece)

The other piece $40 on Ebay

High of $58.36 on Amazon.com

Total cost (brand new- high)- $522.29+ tax

SAVINGS- $514+ tax

Total cost (brand new- low)- $215.8+ tax

SAVINGS – $207.85+tax

I can’t wait for our next GAMES NIGHT!

THE LAMPS

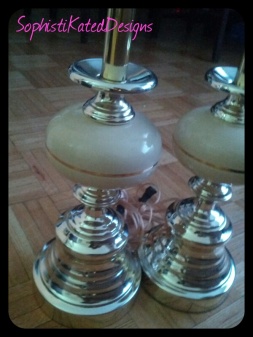
As if that was not enough, I found two lamps that resembles my inspiration pieces. I can’t wait to transform these beauties!

Inspiration: http://media-cache-ec4.pinimg.com/736x/7b/b3/1f/7bb31fe94b2fa7d3efaf7a949039d5b9.jpg

Thrift Find:


p20130422-212232

Updates for my lamps will follow soon!

SKD